HI Resu,
I don’t have 2021, I have 2019
I have same problem in past and I found one solution in 2019 version
If you have surfaces which is not created with command patch or parting surface are not considered in core cavity trim, before you executing trim command you have to use edit parting face attribute command select manual created patch/surface and assign them parting face or patch, all surfaces are either patch or parting surface
now trim core cavity, It works for me
I hope it works for you also
Thanks Mr Patel, I edited the self created surfaces to be parting surfaces, then moved them over to the PATCH column. Trim Workpiece worked first time, dividing Cavity and Core with inclusive patched shutoffs.
Alan
Hello there again, Today is already Wednesday, 7.April.
I am not familiar with all the commands of the software as I am only learning. When you guys say you edit parting face attribute…what exactly do you mean? I have shown in my above example that I have moved the patching surfaces to the column ( subdirectory of the history tree) called _Patch.,. where all the automatic patches created by the software are located…that did not have any effect.
Can you give some small example of how you edit the parting face attribute with an explicit description. please.
Now I have downloaded today the version 2022-30 day license. I have tried again. I was able to patch up the 2 rectangular windows of the part. I did it by this method (and it might be functioning also in the previous versions-I have to try yet):
-
click on the Patch command
-
click on the shape
-
that causes the unassigned 3 inner loops being displayed in the window called Loop (it show Loop 0, Loop1 and Loop2-these 3 loops are the parting loops of surface edges, which the software can see, but for some reason cannot patch automatically-so you have to do it manually.
-
Loop 1 (is one of the 2 small windows)-I erase it and then select manually the same boundary…and the patch surface is created. It is made up of 4 smaller section surfaces, which I have joined by “Merge Faces” command into 1 smooth surface. It is assigned a subdirectory in Time Tree, called “_Patch_1”
-
I did the same for the second patch surface(Loop 2 in the list of loops of the Loop command) in the other little window. The patch surface was created and the subdirectory “_Patch_2” was created.
(continue in next post)
- when I came to the big Patch surface(made up of the 4 surfaces) of Loop0 I could not use the same method. Because here are 4 separate surfaces, which have to be sewn together. The patch command doesn’t have that option(in version 2021 and 2022 - I do not know about the older versions). So I have to use create N-sided surface(under the Free Form…Basic Face menu)…But using this option, rather the Patch command does create patch surface in the tree, but doesn’t create the subdirectory(which I expect), called “_Patch_0”.(as in the case of the other 2 patches). And that causes a problem again…that particular surface is not recognized as a patch(even though it is listed as a patch in the Time Tree-but doesn’t have the “Patch)” subdirectory. So when I execute the Trim command, the 2 blocks(Core and Cavity) are only a set of surfaces(not solids) and this particular surface(made up of 4 smaller ones) is missing…The other 2 small rectangular windows are OK.
Now consider this: if I was a small company and I bought the software and accepted the job from some other firm. And then found that I cannot do it, because of these kinds of problems…what would happen??? I would be out of business in no time! Because the word gets around…
I would expect software “manufacturer” of this caliber would have a quality control team, who checks most everything and is responsible for not catching any and all errors, before the software is released into the engineering community.
It doesn’t throw a good light on a company, especially knowing, that the changes to the software from year to year are relatively minor.
Hi resu
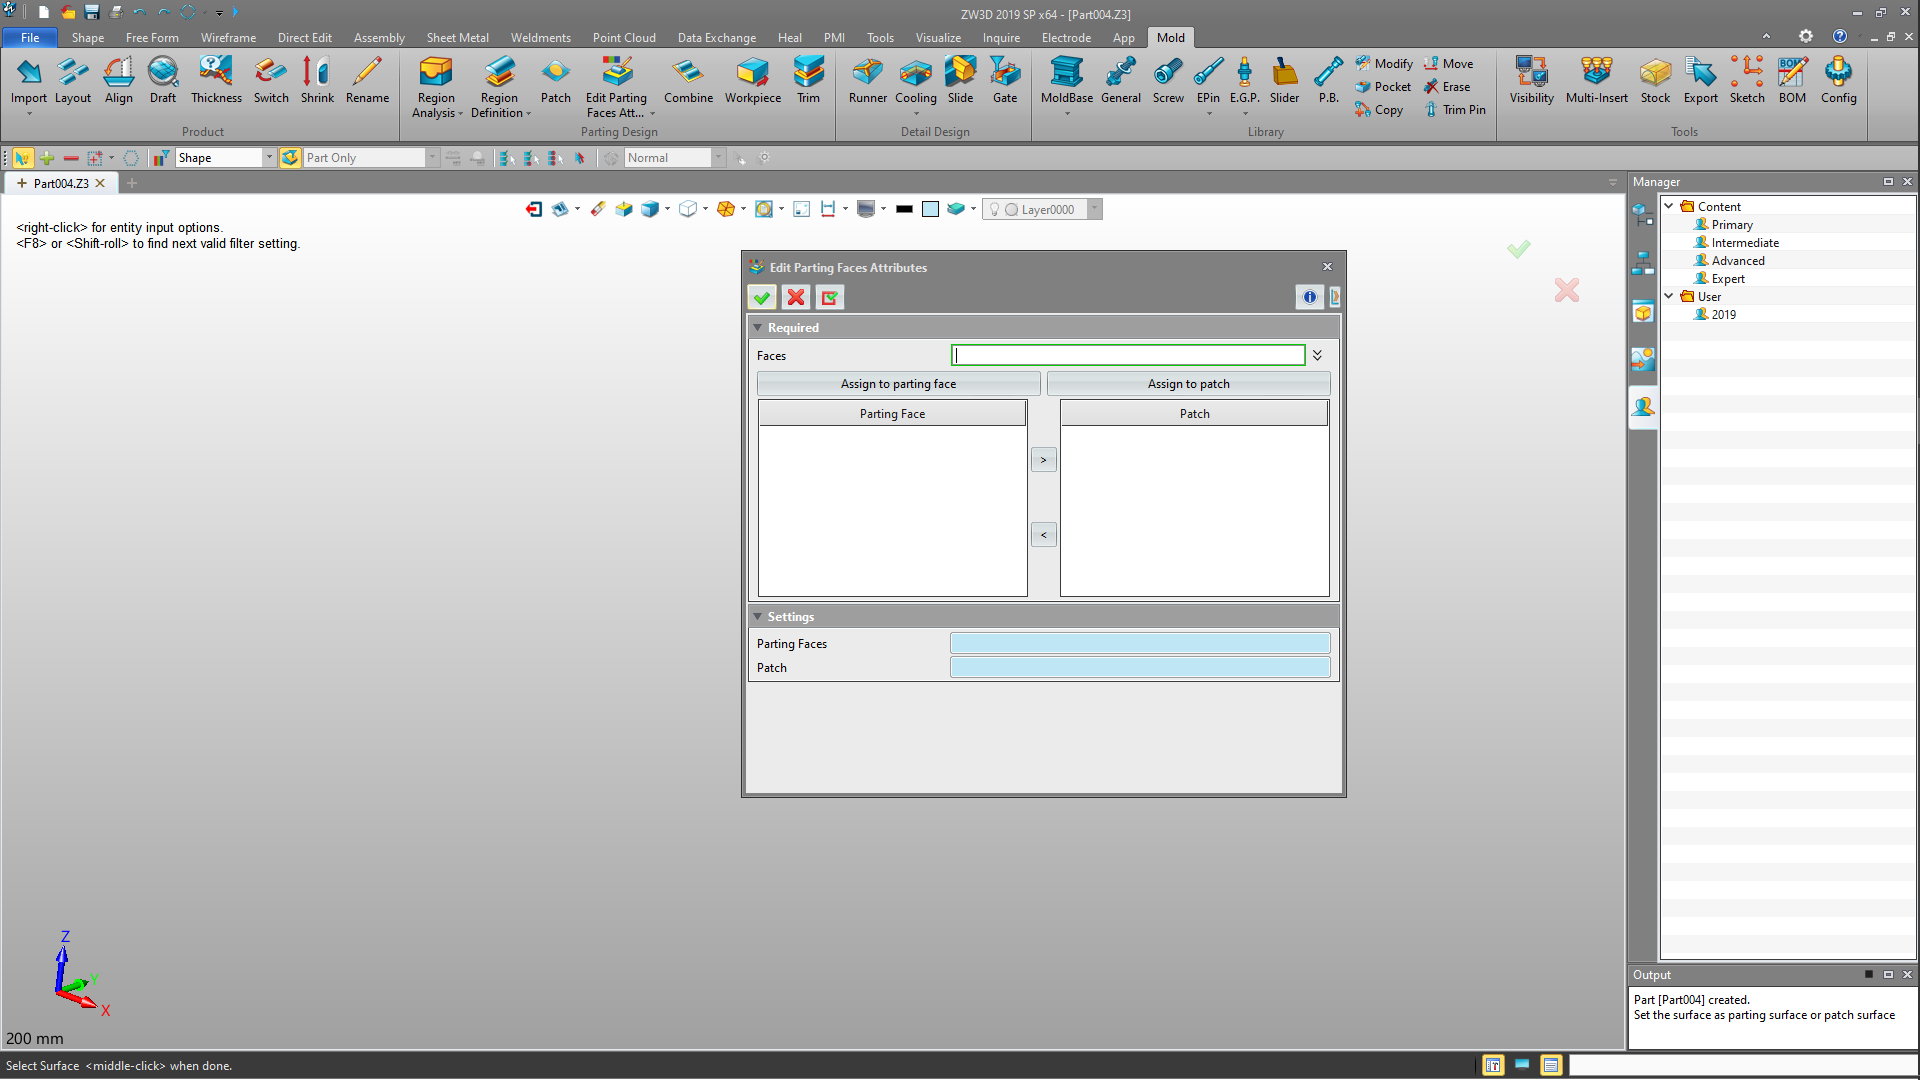
please check image
you can find command parting surface drop down menu
you have to assign all surface to parting or patch surface before trim
2 Likes
Thank you so much Sir!
This was the solution I was looking for! Worked like a charm!!!